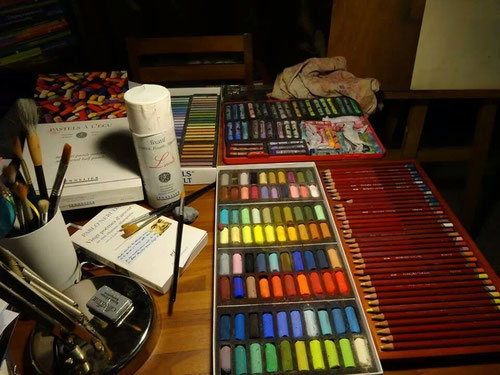
 Vibrant Art - Online Art Supplies
Wed
16
Jan
2019
Vibrant Art's Sustainability Journey

Single use plastic such as grocery bags, straws, disposable cups and bottles make the headlines as major culprits of our earth's plastic pollution all the time. But with increased percentage of our shopping done online, BUBBLE WRAP, SHIPPING AIR CUSHIONS & PLASTIC MAILER BAGS are increasingly adding to this list as we mindlessly unwrap our purchases and toss them away.
Here are some tips to do your part to reduce by reusing these items:
1. Reuse mailer bags as a trash bags for wet waste
2. Give bubble wraps or shipping air cushions to others who can reuse them for their shipments.
3. Turn over a used mailer bag and use the other side when sending out your own package. Might not look fancy, but hey, you are doing your part to help our environment! 🤩🤩
Over time, these little steps add up by increasing the mileage of these items hence reducing the demand for producing more plastic waste.
Vibrant Art sends out our packages in plastic mailer bags so do reuse these after you unpack your order! Our bubble wraps are mostly from companies and friends who pass them to us after knowing our direction to promote less single plastic usage. The bubble wraps are clean and in great condition PLUS the feel good effect is sooooo AWESOME! 😍
In terms of business practically, it helps us reduce costs which we then pass down to our clients in terms of prices and regular storewide discounts.
It's never too late to start to repurpose your usually single used plastic items. We'd love to hear your ideas on how else to reuse these items too!
Fri
17
Feb
2017
How Safe Is it To Use Oil Paints?
How Safe Are Oil Paints
Traditional oil paints are basically a mixture of drying oil and pigment. Manufactures add stabilizers because modern paints need to be stored for a considerable length of time before use. These stabilizers keep the oil from separating from the pigment.
Drying Oils
Drying oils used in artists’ paints are mainly linseed, safflower, poppy or walnut. The most commonly used is linseed oil which is safe to work with because we can buy specially processed food-grade quality linseed oils in health food stores as a great source of omega-3 fatty acids aka flaxseed oil. Some of us even eat flaxseeds on a daily basis to maintain healthy! We use both safflower oil and walnut oil in cooking. Poppy oil is used in paints; and also in skin and hair care products (known as Khus Khus and recognised in Ayurveda).
Stabilizers
The stabilizers are metallic fatty acids. Because they’re mixed into the paint, they are not a hazard to a person using an art material.
Soaplike Substance
Water-soluble oils contain an ingredient that would be considered close to soap, which makes water combine with the oil for assistance in clean up.
Pigments
Many of the paints used by artists from the Middle Ages to the late 20th century had varying degrees of toxicity. Even today, while the most highly toxic pigments have disappeared, to err on caution, no pigment should be considered nontoxic.
What makes oil paints so safe to use is that the pigment is bound in a liquid vehicle (the drying oil). Therefore the problem of dry powder finding its way into artists’ lungs or flying about and landing on their families’ food is eliminated. Even the nastiest of pigments, which no longer are readily available, wouldn’t give off toxic vapors or be otherwise harmful unless taken directly into the digestive system by mouth or, in the case of some pigments, they came in direct contact with unprotected skin.
Nonetheless, I would advise artists to wear a mask and disposable gloves when handling dry pigments. Ensure the room is well ventilated but without strong gusts of winds that can blow the pigments all over the place.
Safe-Use Practices for Oils
Keep paint and solvents off your skin.
The skin is the largest organ of the human body and is a sponge for absorbing substances. Just see how fast your moisturiser gets absorbed into your skin after slathering it on! It’s best not to allow oil paints to splatter on your arms and hands. This is even more so when a solvent such as turpentine is used after to remove the paint from skin. It would just be absorbed by the skin, thus entering the body.
Again, disposable gloves can help keep the fingers clean, especially if you are a messy painter, like me. I can even
go through 2-3 pairs of gloves during long painting sessions! Wear a long apron (Vibrant Art carries full length aprons to protect your body and legs, unless you are super tall, then wearing pants
with the apron will work). Applying a barrier cream will also help protect against paint components entering through the skin. I would recommend a non-perfumed cream.
Paint in a well-ventilated area.
Ensure your painting space has a continuous airflow and exchange. Many artists don’t have studios, and some paint in their kitchen but this is one place where food and painting materials have a high chance to come into contact with each other. In addition, the potential for fire rises when solvents come into close contact with cooking appliances.
Best is to set up a painting area in another part of the home where you can ensure ventilation that constantly changes the air in the space.
Most artists use oil paints for many years without ill effects on health. Follow the few safety precautions listed here, and you’ll be safe.
Happy Painting!
Wed
07
Dec
2016
FEATURE BLOG - DA VINCI BRUSH CLEANER - CLEANING AND MAINTAINING THE BRUSH HEAD
Most important is to obey the following fundamental rules:
1. Water-soluble colours should be washed out with water.
2. Acrylic colour, as long as it is wet, should be washed out with water. When dried up it can only be dissolved with special cleaning agents.
3. Oil colours should be wiped off thoroughly with a piece of cloth, then washed with brush soap.
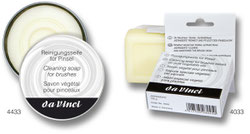
4. Hairs, bristles and synthetic fibres should be cleaned with a special soap (product ref. 4033 and 4433), that cleans and maintains the brush head on the basis of vegetable oils, and warm
water until the soap begins to produce white lather. Do not use strongly fat removing soaps! Especially natural hair tends to break if they are missing their protecting fat contents. By that
you elevate the life as well as the suppleness of your brushes.
5. To wash out the brush, rub the hair body of the brush carefully and remove the remains of pigment that chiefly stick to the edge of the ferrule.
6. Afterwards wipe the brush with a fine piece of cloth and bring it to its original shape. Artists call this procedure “dressing”.
7. Let the brush dry completely before you use it again. Don’t put it on the radiator to dry. There the hair will dry too quickly, the handle will shrink, and the brush head will come loose.
Thu
15
Sep
2016
Creating your own Art Therapy Practice coupled with Yoga
Art therapy, art journaling and yoga have been catching on over the years as more of these healing workshops become available in yoga studios and private art studios globally. These sessions aim to ease the tensions of our highly stressed lifestyles and day-to-day grinds. Couple these activities with relaxing music and aromatherapy oils and VOILA!... A wonderful multi-sensory experience to open your body, mind and soul for self-reflection, self-expression and a deeper level of relaxation.
So how do you re-create this practice in your own home? Here are some basic steps:-
1. Create a quiet, private space and pull out the aromatherapy oils
Choosing a clean, uncluttered space is important for relaxation and healing, whether it is in your home or your art/yoga studio or even outdoors. Make sure you choose a private, tidy area that allows you to feel peaceful and calm. Put your phone on silent so that you do not get interrupted. Set up a playlist that will last the duration of your session.
Get the essential oils out and place a few drops of your favourite oils into the palm of your hands. Rub your palms together, sit up tall, close your eyes and take 5 deep breaths. Feel your sitting bones sinking into the earth and feel your spine and crown of your head lengthening towards the sky.
2. Yoga and Meditation
Get the circulation going by doing some yoga asanas. Perhaps you may like to follow a youtube video. Or just let yourself flow – see what your body craves for – sun salutations, arm balances or stretches. Listen to your body and let it guide your pace. Spend 20-30 minutes moving through your own sequence of asanas.
After yoga, take a 5 minute savasana (corpse pose) or seated meditation. Observe any feelings and sensations in your body that arise during your practice.
3. Art Making
Have all your art supplies at hand – your water colours, oil paints, acrylic paints, charcoal sticks, pastels, paper, canvases so that you have everything within reach to dive straight into your creative process. Begin by drawing what you feel, your first thoughts, your fears, your hopes…anything that you want in the centre of your canvas or paper. Then work your way out. Feel free to express your ideas without judgement and without second guessing yourself. You can even use your breath or the music on your playlist to guide your mark makings. Be in the present and express yourself fully through your paint strokes, choice of colours and subjects.
4. Journaling
Have your pen and notebook handy and write down your thoughts or whatever is on your mind. Again, do not judge your thoughts. Simply observe them, write them down – do it for at least 2 – 5 minutes uninterrupted- longer if you wish. It’s perfect to keep you in the present and unburden any lingering thoughts.
5. Witness and reflect
Look at your art work and your journaling. Write down what comes to mind. Questions, comments, fleeting thoughts or associations then try to draw insights about yourself. Do all this without thinking or second guessing – just write. Then observe how you feel after creating.
Do you feel more relaxed and clear minded than before your session? Did you learn something new about yourself? Witnessing and reflecting on your session will help you grow and understand yourself in ways that you never took the time to previously.
At the end of your session, thank yourself for taking the time to nurture your mind, body and spirit.
Make it a point to set aside time for art therapy at least once a month. You will find yourself growing more mindful, spiritual and grow into a much happier person.
Thu
11
Aug
2016
How To Recognize an Art Scam
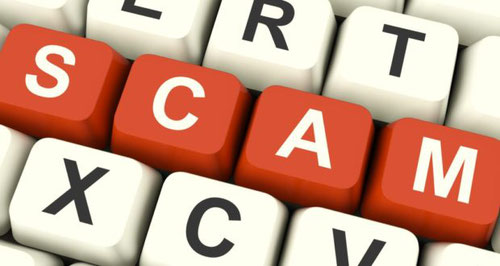
You receive an email or PM from someone who says that their wife or husband saw your artwork online and fell in love with it instantly. They would like to purchase a piece at once, for their birthday – which is coming up very soon. That sounds awesome and you’re just about to celebrate! BUT how do you know if it’s a genuine buyer or another art scam?
Art scams that begin like this takes advantage of the fact that all of us, including artists, love that people appreciate their work. SO you correspond back and forth, and by now you feel as like you know the ‘person’ you’re communicating with already – to get that added trust, scammers often include personal details about themselves or their families to make you feel closer – and naturally you are inclined to respond positively to someone gushing praises about your art.
Artists make good targets for scammers – they understand the need to ship their work, to collectors globally. They are emotionally and financially invested in their creations, so they’re susceptible to the charm of the idea that a stranger fell in love with their work. Scammers also hope that artists are less savvy about the dangers of the ‘real’ world and are likely to be ‘easy’ preys.
Remember that ‘if it looks too good to be true, it always is.’ But while that is a basic rule of thumb, there are actually times when something that seems too good to be true really does happen to an artist. Perhaps a collector you have never had contact with before happened to attend the opening reception of an exhibition of your art, and instantly decided that he had found what he was looking for, and bought several pieces. Or you were giving a demonstration of live painting at an art fair and one of the people you were chatting with during the process turned into a collector of your creations. These things do happen – and you certainly don’t want to put off a genuine collector.
Art Scammers Want Your Money or Your Art or Both
More often than not, art scammers are hoping to get money from you – if they can get their paws on your art too, it’s a double bonus for them! So how do you protect yourself?
Always be wary of Over-Payments - A very common lure is when the ‘customer’ overpays, insists on taking care of the shipping process themselves and asks you to send the extra amount on to their chosen shipping company, using the details they have sent you. You send the money on – from your own bank account – and only discover later that the cheque you had received from the ‘customer’ is not genuine, or the credit card used for payment is a stolen card.
How can this happen? Won’t the bank or credit card company protect you from this art scam? Probably not. Most banks have the policy of being willing to cash or deposit all cheques provided that the customer has a balance in their account that is able to cover the check. If the cheques bounces, they just reverse the transaction – leaving the customer responsible for any negative balance. The banks are protected in their T&C to rightfully do so. It can take up to three weeks to clear an overseas cashier’s cheque, or days to months before the owner of the stolen credit card discovers this. This window of opportunity is what the scammer is hoping to be long enough for them to have you send them the ‘shipping’ money they ‘overpaid’.
Clues that can indicate that an email you’ve received is an art scam.
The person emailing you will usually be in a hurry. This is to fluster you and give you less time to think, but mainly because if they know the cheque they’re sending you is going to bounce, or the credit card is stolen, they need the transaction to be completed before the bank or credit card company catches on and you find out.
There will often be a personal story involving the individual or their family moving country right at the time they want to purchase the artwork, needing the sum you’re going to be sending to cover for the shipping costs
They want to arrange the shipping themselves, rather than let you sort it out for them. Most genuine clients like the convenience someone else handling the shipping for them. And if they do want to take care of it themselves, real collectors will most likely use a major company (names the general public would be familiar with) they’ve had positive experiences with in the past.
The email you received is vague and gets the major details of your work wrong, eg. the title, the medium. Scammers sometimes use a generic email and blast it to as many people as possible, hoping that a wide net cast will yield more results.
So what can you do to avoid art scams?
Be firm about following your usual method of payment: if you are not willing to take payment through cashier’s cheques or postal money orders, which are more open to this sort of art scam, explain politely. Often the art scammer will insist on the method of payment they suggested. Stick to your normal method, something you know to be safe. Most genuine collectors will understand and respect the artists’ preferred mode of payment.
Never accept over payments. It may feel as though your work is very much appreciated that the buyer wants to pay you more. The rule of a transaction when you are selling and they are buying is that no money leaves your account. Make it known it is your policy not accept over payments.
Don’t ship your artwork until the payment has cleared. Make sure you keep track of the transaction and have a clear ‘workflow’ planned out. Eg, after money is cleared, prepare the work for shipping with the freight company, then inform the buyer of the shipping details, expected date of arrival and tracking number. Simply tick off the boxes on your to-do-list when each step has been completed. This way you do not forget any important steps, or jump the gun by sending out your works before you have received the money.
Selling art on the internet is gaining more and more grounds these days, just keep in mind these tips to avoid being potentially scammed.
Fri
27
May
2016
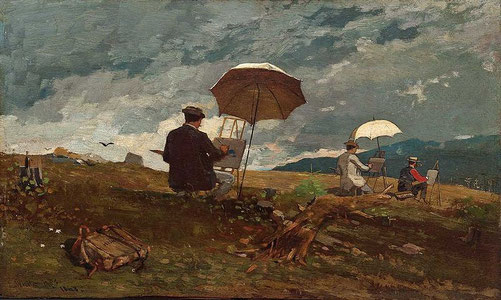
Create more energy for painting - How to set up your painting studio
Setting up your own painting studio can be one of the most exciting things to do. It’s a place where you can escape into another world, exploring new ways to create endless possibilities of paintings! So put some thought into arranging the space out because working in a poor environment can really hurt your performance.
Some tips for a cosy painting studio
- North light coming from above and plenty of artificial light for painting at night
- Enough space for a large easel arrangement, a model stand
- Shelves or trolley to neatly store art supplies within easy reach
- Fridge filled with nom nom munchies J
- Large monitor or photos next to my easel for reference
- Far away from any noise and distraction
- Lots of wall space to hang inspirational artwork
- Ventilation – large open windows to let in natural breeze
- Music …yes yes!
- High ceilings
- Keep it clean
- Minimise clutter – rid the place of excess furniture, unnecessary storage boxes etc.
Making a good painting is hard work, requires focus and energy from the artist. So managing your energy while you paint is important because the more energy you have for making the brush marks, the better the painting will be. As you become fatigued it’s easy for the quality of your painting and your joy in the experience to diminish. SO get rid of clutter which are sneaky little energy vampires, keep the studio airy, bright and clean. Don’t under estimate how good having a clean studio floor to lay about on while you contemplate your brush marks can feel.
The loss of energy is usually in the details of how you set up to paint. The energy loss with any one mistake is small, but if you have several small losses, they can really add up, and the longer your painting session lasts, the worse the losses become.
Tips to minimise the ways you can lose energy:-
· Be physically comfortable in your work space. Do you also have enough room to move back and forth to view your painting as you work?
· Keep all of your tools within easy reach. Before you settle in to paint, collect all the tools you need to work with so that you don’t have to fetch them as you need them. Then you can stay in the flow of painting.
· Always have the brushes and palette on your handed side (If you’re right-handed, the materials should be on that side, and on the left side if you are left-handed). If you’re constantly reaching across your body to reach your brushes or palette, then you’re using up valuable energy every time, and it’s an unnecessary loss.
· Keep your reference material close in relation to your painting. If it’s a tablet or computer screen, have it clipped near the area you are working on. The closer it is, the easier it is to focus on the area you are working on.
If it’s a photo, place it right next to where you are working. If you are working on an area that’s near the centre of the photo, then fold back the edges so that you don’t have to look over information that isn’t necessary for the area you are not painting. Cut the photo into ‘bite-sizes’ if necessary. You can always make an extra copy of the reference photo or tape it back together. It’s supposed to only be a tool to help you paint, a means to an end- your final painting. Energy saved!
If you are working from life, then make sure that your set up or model is easy to see, with little distraction between it and your painting. Minimize the movements taken by your body and arms as you look from reference to painting. Make sure that your movements are comfortable and small. Every bit of energy you save can go into creating the best painting.
· Adjust the height of your easel to work for you, and not against you. Your painting should be almost vertical. If your easel is leaning too far back, then you are wasting energy reaching in to paint on your canvas. Always be sure that you’re reaching your arm out, it should not be above your shoulder but same height or below. Reaching above your shoulder, will tire your arm quickly and drain out unnecessary energy.
An energy efficient work space + energy efficient work habits = Happy and creative artists.
Happy painting and keep working at your art!
Sat
14
May
2016
Tips on Glazing


What is glazing
A glaze is a thin, transparent layer of paint and glazing is building up colour by applying thin, transparent layers one of top of another. This can only be done when the layer beneath is completely dry. Each glaze tints or modifies those beneath it.
Glazing will give you colours with a luminosity, richness, and depth you cannot get by mixing colours on a palette. This is because light travels through all the transparent layers (glazes), bounces off the canvas, and reflects back at you. Your eyes mix the layers of colour to ‘see’ the final colour, giving a luminosity you don’t get with a layer of physically mixed colour.
Tip No. 1: Transparent Colours
Transparent colours work best for building up rich, subtle colours through layers of glazes, but this is not to say you shouldn’t experiment with opaque colours. But if you’re just starting to try out glazing, stick to transparent colours and keep opaque colours for the lower layers that will be glazed over. Usually, the tubes of paint will state if it’s transparency.
Tip
No. 2: Be Extremely Patient
If you apply a glaze onto paint that isn’t totally dry, the layers of paint will mix together, which is just what you don’t want to happen. If
you’re working in acrylics, you can speed up things up by using a hair drier to dry a glaze. How soon an oil glaze will be dry depends on the climate you live in and your studio condition; do
some sample glazes to find out and keep a journal to record the findings. The paint must be dry to the touch, not sticky. The trick is to work on several paintings at once so you can move from
one to another while you wait for a glaze to dry.
Tip
No. 3: Glazes on Smooth Surfaces
A glaze is a thin layer of paint which should lie smoothly on top of the previous layers. It’s something to experiment with once you’ve mastered the basics of glazing. A smooth hardboard panel or
fine-weave canvas is ideal to start with.
Tip
No. 4: Use a Light Ground
Use a light-coloured or white ground, which helps reflect light, rather than a dark one, which helps absorb light. If you’re not convinced, do a
test by painting exactly the same glazes on a white ground and a black or dark brown one.
Tip
No. 5: Glazing Mediums
Glazing mediums thin the paint you’re using to the
right consistency for glazing and, if you buy a fast-drying formula, speed up the rate at which the paint dries. They also solve any possible adhesion problems arising from diluting the paint too
much, particularly with acrylics. Experiment with the ratio of medium to paint to get a feel for how much to add; too much and you sometimes get a glassy, excessively glossy effect. A good rule of
thumb is not to use more than 10% water when diluting acrylic paints. It is much better to use a flow medium to change the viscosity of acrylic paint.
Tip No. 6: Use a Soft Brush
Glazes want to be painted smoothly, without visible brush marks. Use a soft brush with rounded edges, such as a filbert brush. A stiff, hog-hair brush can also be used for glazing. Although it’s more economical, it’s not ideal if you’re new to glazing. Flicking over the top of the paint with a dry fan brush is useful way to eliminate visible brush marks.
Tip
No. 7: Unify a Painting With a Final Glaze
When the painting is finished, apply one final glaze over the whole painting. This helps unify all the parts of the painting. An alternative is to apply a final unifying glaze to just the
elements in the focal point.
Wed
11
May
2016
What are Mediums for?


What is Medium?
Medium is the binder in a paint, the main ingredient besides the coloured pigment. In acrylic paint the medium is acrylic, a plastic polymer. You can also add a variety of mediums to the paint for thinning and glazing, as well as for thickening, modelling, and textural effects (gels and modelling pastes). They can be used to prepare your canvas, change the texture, adjust the flow, alter the working properties of the colour or protect your painting.
Because they include acrylic resin, mediums maintain or add to the stability of the paint film, and can be used in any amount desired, are mixed with paint for thinning and glazing, and can be used as an adhesive for collage and mixed media work."
Adding mediums instead of water helps to preserve the brilliance of the colour and the natural shine of acrylic paint (unless you use a matte medium). A thinning medium will help the paint maintain its inherent composition while allowing it to flow and be brushed onto a surface easily. There are no rules for combining acrylic mediums with acrylic paint since they are made with the same emulsion base and dry at the same rate.
Different thinning mediums
Gloss medium enhances the natural sheen and brilliance of acrylic paint and dries with a glossy shine. It also makes the paint more transparent and is useful for glazing.
Glazing medium is similar to gloss medium, making the paint thinner and more transparent, useful for glazing. It might also be referred to as glazing liquid. It should be applied in thin layers and dries quickly.
Matte medium is a gloss medium with wax emulsion or silica added. When dry it has a matte, non-reflective surface.
Semi-gloss medium is a mixture of matte medium and gloss medium.
Flow improver thins acrylic paint while maintaining its strength without affecting the character of its finish. It allows the paint to flow evenly and quickly and is useful for creating even washes over a large area.
Retarder is actually not a medium but an additive. It helps the acrylic paint dry more slowly and stay workable longer, allowing you to blend colours more easily and smoothly. Because it is an additive rather than a medium you have to be careful not to add too much retarder or the paint will not dry.
Shop our full range of Sennelier mediums & additives at:-
http://www.vibrant-art.com/additives-binders-mediums-thinners-retarders-varnishes/

Thu
03
Sep
2015
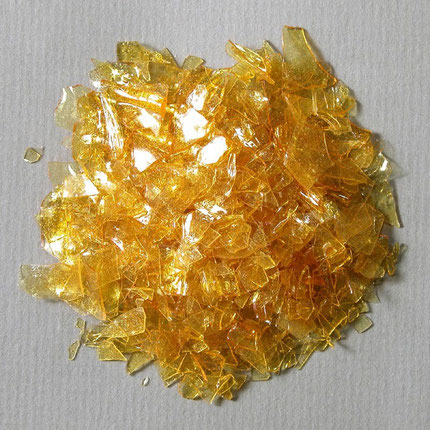
Pure Mastic Gum Varnish - The Best Natural Plant-Based Varnish
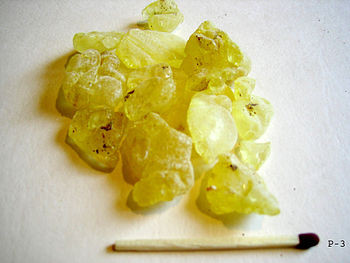
Mastic is a resin obtained from the mastic tree (Pistacia lentiscus). In pharmacies and nature shops, it is called "Arabic gum" (not to be confused with gum arabic) and “Yemen gum”. In Greece, it is known as the "tears of Chios," being traditionally produced on that Greek island, and, like other natural resins, is produced in "tears" or droplets.
Originally a sap, mastic is sun-dried into pieces of brittle, translucent resin.
The word mastic is derived from the Greek verb, "to gnash the teeth", which is the source of the English word masticate. The word mastic is a synonym for gum in many languages.
Mastic Varnish has a semi-gloss finish that naturally increases colour luminosity. It is an extremely durable varnish and is often used in conservation and restoration work. Being one of the
strongest binding resins, mastic is quite permanent. The addition of natural mastic resin to turpentine as a varnish dates back to at least 700 B.C. At the time of the Old Masters, it became
common as a finishing varnish as well as a major ingredient in oil painting mediums. It continues to protect master paintings in museums around the world.
How to use Mastic Varnish
Preparation:
|
|
|
|
Make sure your painting is dry to the touch, and no areas are still wet as the paint might run. Paintings can be varnished within 2-3 weeks after completing the painting, but if time permits, it is recommended you wait 6 months.
Application:
Use a soft, natural bristle brush (Flat, preferably 1.5 or 2 inches).
Dip the brush into the jar of varnish, and press against the rim to remove excess varnish. Brush the varnish onto the painting, spreading the varnish as you go to create a thin layer. Do not
scrub very hard, just enough to spread the varnish around. The varnish will start to set up and get tacky quickly, so don't go over areas many times. When necessary, dip brush into jar again and
continue brushing onto painting until fully covered with an even thin layer.
Paintings usually require anywhere between 1-3 coats. Make sure varnish is again dry to the touch and not tacky before applying another coat. Leaving a painting in the sun will usually dry the varnish in 1 day. Depending on climate, you may have to wait a few days to apply another coat.
Thu
04
Dec
2014
DRAWING - A DYING SKILL - posted on 4th December '14
Drawing, a skill once regarded as the core foundation of any artist is in severe decline. It's demise could possibly be due to art schools globally pushing for new technologies and seeking new directions, hence regarding drawing as passé.
Embracing new technologies does not make the artist better at creating high quality work, but the mindset seems to sway towards being ‘in’ and ‘creatively sexy’. Hence drawing is now no longer pursued and this skills set is dying out.
In the Renaissance period, drawing was the basis of the three arts: painting, sculpture and architecture. Unless you could draw, you would not do these things very well, and it still holds true today. People in the art world have this idea that learning to draw is conservative and somewhat a waste of time. But the opposite is only true! Learning to draw will give you the freedom and confidence to do these very things. It is both a creative and intellectual discipline sharpening the observation skills of the practioner.
Many new generation of aspiring artists do not possess the basic knowledge of perspective and tonal values – these are the most essential skills to art making, be it painting, digital art or even film making. It’s made worse as many art schools have theory-heavy curriculums and the arts industry increasingly perceive drawing as ‘old fashion’.
Artists who practice drawing for the sake of drawing, benefit by seeing the world in a different way, being used to paying attention to the fine details.
In order to keep this skill from dying out, perhaps more emphasis and time spent in the life drawing studio, learning still life and landscapes will save it from extinction.
Wed
09
Jul
2014
COMMON MISTAKES OF NEW ARTISTS - Posted on 9th July '14
New painters often make the same mistakes over and over when they are starting out, but often not knowing that they are even making them. While mistakes are part and parcel of the learning journey, and should be expected when starting out; correcting those mistakes can become the first major milestones in your art career.
By a rare stroke of luck (or genius) a mistake can transform a finished work into a masterpiece, but for beginners, mistakes are simply tumbles that become stepping stones for artists to improve. Here are some of the most common mistakes new painters will make:
1. Mixing paint on your canvas.
Mixing paint should be done on your palette. Trying to mix and experiment with color on your canvas, leads to messier brush strokes and often the wrong shade of colour that will be hard to cover up as you paint. Use a large palette to mix on, or simply a flat piece of white acrylic sheet solves the problem.
2. Do not poke at the canvas with your brush.
Unless you are painting in Pointillism, poking your brush to the canvas will split your brush and push your colours in odd, uneven blobs. Using short strokes and dabs is more efficient and will yield a more uniformed colour.
3. White out!
While mixing with white is fine to create lighter or pastel colors, adding too much white directly can blanket out a canvas and make your paintings look muddy and cold. Unless of course, you are painting a winter scene.
4. Don’t be stingy with paint.
Do not be afraid to use lots of paint on your canvas. Many new artists are afraid to use too much paint at several points during the painting process, both on the palette and on the canvas. You can always buy more paint so do not be afraid to use too much. Better too much than to leave thin areas on your canvas and have the paint dry out too quickly. In regards to your brush, use lots of paint and big strokes on your painting. Having too little paint on your brush can make your paint look dry and scratchy when it hits your canvas.
5. Using cheap hobby paint and pastels.
Do yourself a favor and buy some better paint than from a cheap hobby store. Hobby paints will perform poorly on its own without any mistakes on your part. Vibrant Art-Online Art Supplies proudly carries the well-made French paints from Sennelier, at affordable prices. High quality artist paints are better and offer many more colors than hobby paints which are made with fewer pigments and more filler- so buying cheaper hobby paints equates to spending your hard earned money on more fillers than pigments. Instead try a paints like Sennelier artist range.. They all have higher pigment counts and better lightfast ratings and will paint smoother.
It goes the same for using cheap pastels, whether oil pastels or dry pastels. Use artist range pastels which have high percentage of pigment than cheap hobby or kids range of pastels. You get more saturated colours with less strokes. I always say- “A little goes a long way with Sennelier paints and pastels”.
6. Do not be afraid to make any mistakes.
You will make them, so don't get all stressed about them. Making mistakes is part of the learning process. If you are not making mistakes, you’re not working at your craft and improving. Just be sure to correct mistakes as they happen and learn from them, they will make you a far stronger and confident artist.
7.Use high quality paint brushes
Using cheap hobby brushes will not only frustrate an untrained artist, it serves to waste precious learning time and makes the whole learning process less than pleasant. Invest in good quality brushes, whether natural hair or high quality synthetic hair brushes, as they perform better, paint the stroke you intended more efficiently and they last a lot longer - of course this goes hand in hand with taking care to wash them properly. Vibrant Art-Online Art Supplies carries a wide range of French made, Raphael and Isabey brushes; and German made, Da Vinci brushes, together with the brush soaps to keep your investment in tip top shape and prolong the lifespan of your tools.
Thu
12
Jun
2014
DEVELOPING A HABIT TO PAINT REGULARLY - posted 12th June '14
Many a times, we think about painting or chide ourselves for not painting enough. We may find reading up about painting, talking about it with friends or attending an art exhibition is easier than actually settling down to paint. Heck, even clearing out a messy closet or putting up that set of DIY shelves is easier!
Don't get me wrong, there's always a good reason to procrastinate. Like many artists who are not yet, or maybe never want to be, making a full time living with their art, hold a full time day job. You most likely would be tired at the end of the work day, and by the time you set up your work area so that you can continue where you left off 2 weeks ago, it's time to put it all away again and sleep.
So how do you make it more conducive and appealing to paint regularly, even daily? Do whatever you can to make painting as effortless as possible, because the more you do it, the easier it gets, and before you know it, the habit forms.
1) While it's unrealistic to expect to hit the road running and paint every day, at the beginning, aim for twice a week. After 2 weeks, push that to 3 times, say on Tuesday, Thursday and Sunday.
2) Most importantly, set aside a designated space that you don't have to dismantle and re-set up each time you work. When the area is set up, all you need to do is go there and start mixing your colours to get down to work!
3) Schedule in the time - it doesn't have to be a full 4 hour session, because that's too daunting and you may even avoid starting, let alone doing it regularly. 1 hour, focused, is better than four, puttering and wasting precious time.
4) Allow yourself to make ‘mistakes’ and experiment, each ‘mistake’ is a learning experience and you grow to understand your style over time. When you free yourself from the obligation to produce a saleable work every time, you will enjoy each painting session more. This makes you look forward to the next session.
5) Recognize that you can't do everything, and in order to make the time for painting, something else may have to go. It could be an exercise class, your favourite drama serial ( you can always watch it on your smart phone the next day whilst commuting to work J )
Similarly, taking art lessons and then not painting and practicing on your own could end up a waste of your time and money. If you do not practice what you have newly learnt, all that effort may go down the drain. Painting regularly and making it a habit will take you further faster in your art career and skills development. You will also be pleasantly surprised to learn more about yourself in the process.
Posted by The Vibrant Art Team
Tue
20
May
2014
YOU ARE NEVER TOO OLD TO START PAINTING - Posted on 20 May '14
It’s never too late to start painting. Even if you left off during your childhood, or previously started up this hobby just to pass time during the weekends, or put a halt to it as the practicalities and demands of life got in the way. You are never too late to start up again or simply begin painting – and living creatively.
In this youth oriented culture, the ‘more matured folks’ tend to lose their passion, and it is truly a shame to allow age to get in the way of developing yourself creatively. How much better it is to take ourselves to a painting class, a plein air session with friends, a dance lesson, charity work, hiking trips, than to be a couch potato, slumped aimlessly in front of the TV. Picasso said death would simply interrupt his work. Such passion for creative achievement is to be admired and mirrored.
“But how old will I be when I finally really learn to paint / dance / play the violin / ride a bike?” The answer to this common question is : The same age as if you don't!
So why not start painting, discovering yourself and living your life creatively. You will not only develop a new skill, you will find you begin to understand yourself at another level, even discovering new things about yourself that were not apparent to you previously. You have all to gain from painting and nothing to lose!
In painting, you need not let go of oneself completely in order to make “real” art. In fact the opposite is true. In order to get to your art, you have to understand yourself, not abandon self. That’s where art lives, it’s deep in the core of us. Hence actually, making art is for the brave-hearted. It’s a journey of the soul. We often have to strip away layers of ourselves and itself is not easy sometimes. To make real art we must be real.
Be brave and don’t let the demands of life become a convenient excuse not to pick up those brushes. It’s better to paint later in life than never and start on the journey of artistic discovery. You may regret the time missed out on painting, but surely that's all the more reason to start today. Not tomorrow, not next week, but TODAY!
Thu
20
Feb
2014
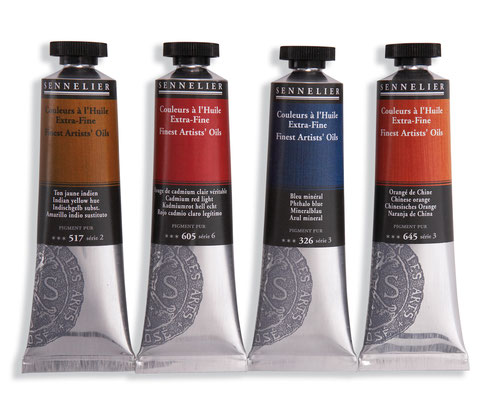
INDIAN YELLOW - HOW IT WAS ORIGINALLY MADE


IINDIAN YELLOW is a fascinating color : bright , translucent , a warm, sunny tone that is an integral part of the painting today .
But where does the name of this beautiful reddish- yellow hue come from?
The former is easily explained - from India, probably from what is now the state of Bihar , situated between the Himalayas and Calcutta.
To determine the origin of the pigment which was shrouded with rumors and secrets for a long time as nothing was known about it. From Calcutta, these lumps of thickened substance arrived to England. The smell was very peculiar to unpleasant, which caused speculation about the base. Suspicions were that it had to be of animal origin !
Rumor has it that the raw material is from the urine of Indian cows that were fed with mango leaves over a longer period and had their fluid intake decreased. Thus the urine is colored bright yellow. The collected liquid was boiled for hours until said consistency was formed and made into balls and then sold.
The process was allegedly declared inhumane and outlawed in 1908, as the cows were extremely undernourished, partly because the leaves contain the toxin urushiol which is also found in poison ivy.
Today, this dye is artificially or from plants ( Reseda luteola ) - so do not worry ! No animal were and ever will be harmed just to produce this colour.
Indian yellow was used by artist painters in both oil paintings and watercolors. Due to its fluorescence, it is especially vivid and bright in sunlight. It was likely first used by Dutch artists, and before the end of the 18th century it was commonly used by artists across Europe.
Fri
14
Feb
2014
Vibrant Art - Online Art Supplies webstore tie up with The French Bookshop, Tiong Bahru, Singapore


A Japanese magazine spread in November '13 - taken when Vibrant Art-Online Art
Supplies webstore had a tie up with The French Bookshop, in the uber cool neighbourhood of Tiong Bahru. This bookstore is a cosy enclave which displays artists' works and sells interesting books
(both French and English).
The photo in the magazine shows off our most exquisite paint set displayed in
the front of the bookshop seen here.
Sat
11
Jan
2014
8 Tips on Cleaning & Maintaining Your Brushes


Fundamental Rules to maintaining and extending the lifespan of your brushes.
1. Water-soluble colours should be washed out with water.
2. Acrylic colour, as long as it is wet, should be washed out with water. When dried up it can only be dissolved with special cleaning agents.
3. Oil colours should be wiped off thoroughly but gently with a piece of cloth, where it is then appropriately cleaned with a special cleaner.
4. Hairs, bristles and synthetic fibres should be cleaned with a special brush soaps or cleaners, that cleans and maintains the brush head on the basis of vegetable oils, and warm water until the
soap begins to produce white lather. Do not use strongly fat removing soaps! Especially natural hair tends to break if they are missing their protecting fat contents. By that you elevate the life
as well as the suppleness of your brushes.
5. To wash out the brush, rub the hair body of the brush carefully and remove the remains of pigment that chiefly stick to the edge of the ferrule.
6. Afterwards wipe the brush with a fine piece of cloth and bring it to its original shape. Artists call this procedure “dressing”.
7. A useful tip is to put some hair conditioner to restore the hair's oils (just like on real hair). Put it on and rinse it off after 5-8 mins. Leaving the conditioner on too long will eat away
at the hair, just like on human hair. This can be done not only on natural hair brushes to prevent the hairs from splitting, it's useful also on the higher end synthetic brushes.
8. Let the brush air dry completely in a cool dry place before you use it again. Don’t put it on the radiator to dry. There the hair will dry too quickly, the handle will shrink, and the brush head will come loose.
Mon
04
Nov
2013
Artists are 'better' protected against dementia - study findings
Art and music are less vulnerable to cognitive decline, a new Canadian study suggests. Neurologists at St. Michael's Hospital in Toronto found that artists suffering from vascular dementia may still be able to draw spontaneously and from memory, despite being unable to complete simple, everyday tasks.
Artists compared with non-artists are better protected. Due to their art, the brain is better protected against diseases like Alzheimer's, vascular dementia, and even strokes. They have more reserve in their brain in order to give functions. What was found based on other neuroscience studies was that, art in any of its forms uses different neuronal avenues inside the brain to do their work. And the activity, the talent and the art per se gives reserve when the brain requires that reserve.
They have noticed in some instances that some of the artists who lost their speech, could not talk but had their art was totally preserved. The same results occurred not only with painters but with musicians.
Many schools especially in Asia, emphasize on the ‘core’ subjects such as Mathematics and Science. We should encourage schools to increase the teaching hours of art – whether it’s drawing, painting, sculpting and music.
Even in adulthood, we should balance out our work and put in time to be creative. Not only will we be able to function on a better level, the creativity tends to overflow in the way we approach our work on a daily basis. As we know it, art opens the mind, sometimes even the soul. Make art part of your life now. It’s never too late to start. It’s better than many medications and is as important as any ‘core’ school subjects.
Link to the full story from CBC:
http://www.cbc.ca/news/health/
Posted by : Philippe
Tue
29
Oct
2013
Making your own paints from scratch.


Making your own paints can be a joy in itself and although in the day and age, oil paints are conveniently packaged in tubes and available in a wide array of colours and shades . Some artists are still happy to make their own in order to control the ingredients that go into their formula.
Paint basically consists of two components: pigment and vehicle. Pigment particles are suspended in the liquid. Making paint simply means mixing this solid and liquid component together into a smooth paste.
All you need is powder pigment, linseed oil or safflower oil, a palette knife and a clean, flat surface, such as a glass plate on a white back ground or a white acrylic board and you are on your
way to making small batches of oil paint.
If you want to make enough paint that you can store, however, you will need a glass muller to grind the paint. I got mine from a herbal store. If you can’t get glass mullers locally, you can try
porcelain ones as alternatives. Just make sure you wash them throughly so that the colours do not permanently stain the muller.
Wear a disposable surgical glove and mask will help keep your hands from being stained by the pigments and from you accidentally inhaling any pigment powders. Work in a well ventilated room.
Why grind pigment into paint? Although a powdered pigment may appear very fine, it is composed of aggregates of pigment
particles. The aggregates clump together to form larger agglomerates and settle during storage in the paint vehicle. Grinding breaks up agglomerates of pigment particles and evenly disperses them
in the paint vehicle, thereby wetting particle surfaces more thoroughly.
Grinding Oil Paint
The amount of oil required for each pigment varies as some pigments absorb more oil than others. So the following steps help you to prepare oil paint to the consistency you require.
Step 1: Place a small amount of pigment in a heap at the center of the surface. Make a small crater in the center of the heap.
Step 2: Add oil or paint medium to
the pigment slowly—a few drops at a time. The less oil added in the beginning, the easier it will be to break up the agglomerates of pigment particles.
Step 3: Fold the pigment into the oil with the spatula. Continue to blend the pigment into oil, applying pressure to the mixture as you mix it. The correct amount of oil is
added when the mixture has the consistency of stiff paste and appears dry. In the beginning, it is better to grind a stiff paste than one that is soft and runny.
Step 4: Place the muller on top of the paste. Holding the muller firmly with the heel of your hand down and thumb up. Move the muller in a circular motion outward from the
center of the paste. Spread the paste in a thin layer as you grind. The more paste in contact with the surface of the plate and flat bottom of the muller, the smoother the paste will be. The more
you grind, the softer it becomes. Paste that is at first dry and stiff becomes wet and soft.
Step 5: Once the paste is spread out, collect it back to the center. Continue grinding with the muller.
Step 6: If the paste becomes runny, thicken it by adding a small amount of pigment to the mixture. Combine the pigment with a spatula then grind with the muller until
smooth.
Step 7: When the paint has the consistency desired, it is ready to use or store.
Note: Remove accumulated paint from the sides of the muller with the spatula. At times it may be difficult to move or lift the muller from the grinding surface. Using the
spatula as a lever, raise the edge of the muller. Then slide the muller off the surface.
Clean your tools with light vegetable oil, Sennelier odorless mineral spirits or Sennelier Brush Cleaner,
specially formulated to remove paints and preserve your tools. Final rinse with water will do.
Posted by: Desiree
Mon
30
Sep
2013
ART IS ANYTHING BEAUTIFUL!


Description from left to right:
Abstract on Leaves
Acrylic, oil and glass paint on canvas - 60cm x 81cm
The inspiration for the artist came from the sound of leaves dancing with the breeze. Its more intense at the top, softening as the leaves fall. When it reaches the ground, it produces coarse start-stop sound as the breeze drags it along.
Abstract on Trees
Acrylic on canvas - 51cm x 61cm
A dried leaf on the floor gave inspiration to this.
Our body is like the trees. Some cells (leaves) are dying while we are still alive. Every cell is connected to another is one way or another. However, in death, no cell (leaf)
lives. This is painted using with the palms and nails of the artist.
Abstract on Structure
Acrylic, texture and gloss medium, tissue, wire gauze - 76cm x 51cm
For enquiries, please contact us via our facebook or this link below:
http://www.vibrant-art.com/contact-us-feedback/
Sat
28
Sep
2013
YUCKS! There's mould on my painting!


For those living in humid climates or even those with the 4 changing seasons, during those hot humid summer months, you may find your art pieces growing mouldy.
Not to panic, you can use oil of clove as a natural and safe way to remove mould. Clove essential oil removes it by actually killing the spores, not just bleaching and hiding it! Use a dry or even lightly damp piece of cloth (preferably white and lint free) to clear off the layer of mould first, then use another piece of cloth, add 3-4 drops of clove oil and wipe the surface lightly. Using a new piece of cloth to wipe down your painting prevents you from spreading the mould to another part of the painting.
Remember to purchase ESSENTIAL oil and not the fragrance oil version as those are just chemical imitation of the actual product. It's best to use skincare quality clove oil as you are guaranteed a higher quality product.
Posted by: Desiree, Vibrant Art
Sun
30
Jun
2013
Difference in Artist Quality VS Student Quality Paints


Pigments that are pure enough in an “Artist” grade paint are more capable of stretching the variety of hues you desire, and will get you by with fewer tubes of paints. They are stronger and richer—so with them, a little goes a long way. They have what is called “strong tinting strength,” so that a more expensive tube of paint will highly likely last a longer time (much longer than a cheaper range of paint) because you only need to use a small dab on your palette.
Student ( Etude ) quality paints are useful for students or anyone with numerous projects and are on a tight budget. They offer a good enough range of colours and high enough quality for
its price. Sennelier's Etude range are made with a higher quality than most brands in the market. I personally like to use them for underpaintings, and after the artist quality colours over
them.
WHAT ARE THE DIFFERENCES?
Artist Quality
* Widest choice of colour
* Limited colour shift over time
Student Quality
* Less paint coverage
* More affordable price range, especially for students with project works
* Greater colour shift than artist paints
* Good choice for large scale painting and under-painting
1. Price
Paint pigments can be expensive and vary in cost. Manufacturers group colours into various price bands depending on the amount of the raw material and what the raw material is.
The binder (acrylic polymer) is relatively inexpensive in comparison. That is why artist quality paints are split into series.(e.g. Sennelier Series 1 - 6) .The higher the number, the more expensive the paint.
Student (Etude ) quality paints usually come in series 1 and 2. Or Series 3 at maximum.
You still can obtain cadmium reds or orange in student quality, and they are labeled with the word “HUE” .Eg. Cadmium Red Orange Hue [615]
When you see “hue” written on a paint tube it means a close ‘replica’ for a lower and affordable price of available reds and orange went into to making the colour very close to the pure cadmium pigments. So you can expect the student quality paint is never going to have the colour saturation that an artist grade paint will achieve.
2. Opacity
Pigments vary in their transparency by nature, different paints have difference levels of opacity depending on the paint pigments chemical make up. A paint made from earth, such as an ochre ( Brown Ochre ) will be made from crushed up rock, which would be opaque and hard to see through. This will make a paint with good coverage. If you were using a paint with pigments that are man-made ( or synthetic organics), such as Quinacridone Red [679], it would be thinner and more translucent.
They are often labelled on a paint tube, Sennelier uses the following abbreviations:
T for transparent colours
S/T for semi-opaque colours
O opaque colours
HINT: It is very useful to understand the differences so if you need to make a highly translucent glaze, the quinacidones are excellent for glazing (thin layer of paint)
and tinting. While opaque colours cover other paints easily, and are great for underpaintings , making solid, flat areas of colour and correcting mistakes.
FUNNY BUT TRUE: If it can’t pronounced, it is usually a transparent paint, eg. quinacridone. If it comes with an ‘natural’ or 'organic' name eg ochre, umber, it will be
more opaque.
3. Paint sample
On most artist quality paints there will be a colour swatch of the actual paint on the exterior of the tube. This is really helpful when deciding which paints will suit your needs.
4. Colour range
Artist grade paints have a much wider array of colours available. 36 for Etude Oil Colours and 144 for Extra -Fine Artist Quality Paints. While Sennelier's Acrylic paints come in only artist quality.
Different binders are available in different consistencies so you can have a thick paint or thin paint but the thinnest paint will have as much pigment as the thicker paint.
6. Colour shift
Some paint colours look the exact shade required when wet but changes when it dries, going slightly darker.
This is due to the binder (acrylic polymer) that is usually used.
In student quality paints a white binder generally will have been used and usually, the cheaper the paint, the greater the colour shift.
It could cause some frustration for the beginner to accurately mix the exact shade of colour required.
Conclusion
Using the right paints can help greatly in your progress as an artist. Don't be make the common mistake by hesitating in investing in ‘good quality’ paints, putting it off until you
become a better painter. Make your journey as an artist a truly enjoyable one.
Posted by: Desiree
Thu
16
May
2013
Plein Air Tip - Carrying your paints on the plane
Even though acrylic and oil paints are non-flammable, it's best to pack them into your check-in luggage rather than carry it in your hand luggage, and risk having an overzealous security personnel confiscate them. If you carry loose tubes, it's advisable to place them in a ziploc bag to prevent accidental leakages. If your paints come in a wooden set, even better! These are great for the travelling artist as the hardness of the box protects your paints and brushes from being squashed and damaged if the contents of your luggage get flung around by rough baggage handlers! The box also doubles up as a table during your plein air sessions.
Your brushes and palette knives should also go in your checked baggage as they could be considered potential weapons.Mediums, turpentine, and mineral spirits are generally considered as hazardous and not be taken on a plane. Buy them at your destination. If in any doubt, try to get hold of a product information sheet and check with the airline preflight.
Wed
01
May
2013
Shellac Inks - Introduction & Uses
What is shellac
Shellac is scraped from the bark of the trees where the female lac bug, Kerria lacca (Order Hemiptera, Family Kerriidae) on trees in the forests of India and Thailand. The bug secretes resin which form a tunnel-like tube (cocoons) as it traverses the branches of trees.
The raw shellac, which contains bark shavings and lac bugs removed during scraping, is placed in canvas tubes (much like long socks) and heated over a fire. This causes the shellac to liquify and seep out of the canvas, leaving the bark and bugs behind. The thick, sticky shellac is then dried into a flat sheet and broken into flakes, or dried into "buttons" (pucks/cakes), then bagged and sold. The end-user then crushes it into a fine powder and mixes it with ethyl alcohol prior to use, to dissolve the flakes and make liquid shellac.
Shellac naturally dries to a high-gloss sheen. For applications where a flatter (less shiny) sheen is desired, products containing amorphous silica, such as "Shellac Flat," may be added to the dissolved shellac.
Colors and Uses
Shellac comes in many warm colors, ranging from a very light blond (platina) to a very dark brown (garnet), with many varieties of brown, yellow, orange and red in between. The colour is influenced by the sap of the tree the lac bug is living on and by the time of harvest. Historically, the most commonly sold shellac is called "orange shellac", and was used extensively as a combination stain and protectant for wood paneling and cabinetry in the 20th century.
Using Shellac
Shellac is low toxicity, ease of application, and ease of repair are the best reasons to use shellac.
Shellac is most often used in artwork as a sealing finish on wood or other porous substrates that will later be painted over. It can also be used as an isolating film between layers of paint,
both oil and water-based. When dissolved in an alkali and water, it can be used as a fixative in watercolor painting.
Applying Shellac
Shellac can be applied by brushing, rubbing and spraying. Artists find brushing to work best for most applications.
Applying multiple, thin layers of shellac produce significantly better results than one or two thick layers. Thick coats of shellac do not adhere well to the substrate or to each other.
The best brushes for shellac are those that hold a lot of material, allowing it to flow onto the substrate and avoiding excessive brushing. Perhaps the best brush for applying shellac is a fitch
(a.k.a the polecat) brush. This animal, closely related to the weasel, is found throughout Europe and Asia. The best varieties come from Siberia and northeastern China. The fitch tail consists of
very fine hair that has a highly resilient conical shape with a thick belly. It is equal in quality to weasel (red sable) hair.
As genuine fitch and sable hair brushes are expensive, some artists turn to synthetically made ones which perform almost equally well , as the genuine hair brushes.
Although it may cost more, you will soon realize that it’s well worth the price.
Before using the brush in shellac, it is best to dip your brush all the way to the ferrule (the metal part between the handle and the hair) into alcohol and then press it out. This makes the
brush easier to clean afterwards.
A dilute solution of shellac is easier to apply and minimizes brush marks that may be hard to rub out later. Start with a 2 to 1-1/2 lb. cut for brushing.
Cleaning your
brush
To clean your brush, you can use denatured alcohol or household ammonia which cleans shellac brushes well because the ammonia dissolves the shellac. Mix 1 part ammonia to 2 parts water, then wash in soap and water to keep the bristles soft.
If you don't have the ammonia (as you may not commonly buy this), use a brush cleaner to ensure the shellac is properly washed out, especially when using natural hair brushes. This will prolong the life span of your tools.
Sennelier Shellac Inks
This shellac-based ink is shellac-based, waterproof, and dries to a sateen finish. It is great for both watercolor illustration and calligraphy.
Colors are blendable and have a high degree of water resistance without being indelible (marks that cannot be removed).
Blog post and edited by Desiree.
Thu
04
Apr
2013
Why your works may not be liked
Here’s a little insight on reasons why people may not like the art you create. I hope it can give a glimpse into how to approach your works to appeal to the art world. It may not be the things one wish to hear but the objective is to help you come away from this with another perspective of how you continue your development as an artist
I am, myself, guilty of some of these points but I choose to keep an open mind and push on tirelessly in order to grow stronger as an artist.
Here I go!
1. Present your work well
Do take care over the presentation surrounding all of your work. This means a well thought out piece and a portfolio that demonstrates meticulous care and pride has gone into it. Half the battle is won just with good presentation.
2. Give yourself enough time and practice
Don’t expect to become a brilliant artist in a short time. There’s no shortcut around improvement through putting in the hours to practice honing a style and a skill. It will be time well spent. Know this, and enjoy the journey. It will pay off and you will be on the way to develop a style unique to you.
3. The work lacks care and skill
It is important that time is taken to hone your skills and techniques, this will translate into strong works as you develop. There is a fine line between unique and experimental work and poor skill, but if you are genuinely not putting everything you have into taking care over your creations, it results in giving a shoddy piece done and work that is not created to its full potential. This may result in customers losing interest quickly.
4. It lacks emotion
This means your art either fails to convey any of your own emotions through the work, or it fails to evoke any emotional response in the person experiencing your art. Both are important.
5 Be passionate about your work
Don’t create for the sake of wanting to be labeled as an artist or someone who is cool. If you are genuinely enthusiastic and passionate about art and for what you do, the work will speak for itself and without doubt be felt by others. If there none, it will show, so find something to get passionate, ideally obsessed about. The passion you feel will help you get the work done more easily too.
6. Organise your portfolio well
Cut out the stuff that drags down the quality and excellence of your portfolio collection. Don’t include weak pieces and keep work of different mediums, or entirely different styles in separate portfolios.
For example, keep your photography portfolio in a single collection and your pastel drawings in another so that you do not detract from keeping your portfolios clear.
7. Don’t spread yourself too thin - think less is more
The best art springs from a determination to remain focused on making more with less. Taking on too much will inevitably result in less concerted effort placed on more pieces, and the quality of your work suffers as a result.
Get really good at one thing. Excel at one thing, before moving on to the next, if you choose to.
8. Keep abreast on what is happening in the world right now
Ignorance stalls progression in your development as a creative professional. Keep in touch with the happenings in the world by reading the newspapers, magazine articles, books, online posts etc. This helps to add depth to your art works as more information translates to more possible idea. It gets the creative juices flowing faster due to the increased knowledge you have gathered.
9. Get exposure for your works
You’ve put in the time to create your works of art, now put in effort to get the right exposure in order to be known as an artist . It could be via the newspapers, website, exhibitions or art galleries. Don’t just stop at promoting your one favourite piece, include all your best works because if no one knows your other works, you will not grow in approval. People will remain unfamiliar to you as an artist and your works, no matter how beautifully executed they are. People tend to respond more positively to things they are familiar with and this will translate to a good exposure to your art.
Finally and most importantly....
10. Don’t take it too seriously – enjoy the journey
I’m sure by now you are thinking, this is easier said than done, especially when developing as an artist with strong works is very important to you. However, often most important thing in improving the quality of your work is to change the way you see your creative journey.
Make a conscious decision to enjoy your progress ,your business, your audience and your customers.
Always remember this: - being able to create art that is liked and loved is not restricted to those deemed born with natural talent. I wish to emphasise that anyone who makes the concerted effort to work on improving and creating WILL be successful.
Now stop procrastinating and get down to work! This includes moi!
Posted by: Desiree
Thu
28
Mar
2013
Artist Brushes Explained

Artists’ brushes can be divided into two broad categories: brushes for oil painting and for watercolour painting. Acrylics can fit in either depending on whether you are painting with acrylics in the oil manner or the watercolour manner.
Oil Brushes ( also for Acrylic in oil manner )
When choosing a brush, consider the fibres and springiness of the brush. Natural fibres such as stable or hog hold paint better than smooth synthetic fibres, the downside is that it may initially shed hairs more readily into the paint and may not be as springy as synthetic hairs. Solvents used in oil painting, may over time damage delicate hairs of sable but the softer hairs of natural fibres are extremely useful for blending colours.
There are brushes which are a mix of both natural and synthetic fibres to give the artist the best of both worlds. With technology so advanced, some new synthetic fibres have micropores which hold colours as well as natural fibres. Of course, the purists would prefer to stick with brushes made fully of natural hairs.
Handles of both oil and acrylic brushes are generally longer than watercolour brushes as paintings are often much larger so the artist stands back further to see more of the painting at once.
For the travelling artists, there are brushes that can be dismantled into 2 parts and covered to be easily kept in the pocket or travelling bags.
Watercolour Brushes ( also for Acrylic in watercolour manner )
When choosing a brush for watercolour painting, artists have 3 basic concerns: the holding capacity, the spring, and the shape. The amount of water and paint it will hold, so the paint doesn’t run out in the middle of the stroke, is determined by the hairs used. The hairs or fibres used can be natural like sable and squirrel which have a porous shaft and will hold more pigment or they can be synthetic which tend to be more slippery and springier.
The shape of the brush is important as different shapes will make different marks. Round brushes are the most popular brushes as they can be used for the most purposes. There are also flats and short flats (brights) for making square edged marks, filberts (almond shaped, this is a squashed round brush), and specialty brushes like mops for washes, liners (riggers) and spotters for fine marks and fans for blending.
The texture of the brush: springy or soft, and the quality of the point if the brush is a pointed brush are also important. You cannot tell the point quality of a dry brush, you must wet it to see if it holds a point. Brushes are usually sent from the brush makers coated with a light layer of gum Arabic to shape the brush to show what it will look like when it is wet. The artist should remove this coating by wetting the brush instead of bending it when dry as doing this could damage the hairs.
Watercolour brushes tend to have shorter handles than oil and acrylic brushes and can also be obtained as pocket (travel) brushes.
The brush selection for Vibrant Art can be found at: http://www.vibrant-art.com/brushes/
Sun
24
Feb
2013
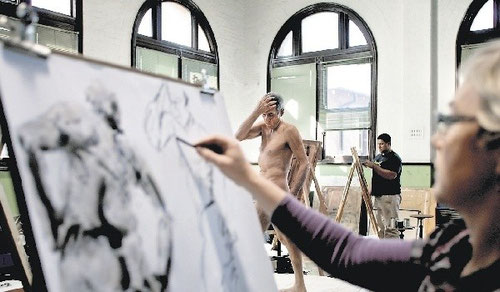
Nude in pastels and charcoal

When BT draws, she really draws up a storm! See her latest masterpiece using with pastels and coloured charcoal.
Bee Tin is one of the artists whose progress Vibrant Art follows closely and whose works we post on our facebook and website blog.
Vibrant Art - Online Art Supplies is always happy to encourage and support our fellow artists in their
efforts to excel. Well done Bee Tin! We love what you have done with this piece!
Vibrant Art - Online Art Supplies would love to encourage artists and art students by posting their works on our website. If you have pieces which you'd love us to share online, please send us a message on facebook. Hope to hear from you soon!
Tue
05
Feb
2013
Guten Tag! Vibrant Art - Online Art Supplies was in wintery Berlin, Germany

Vibrant Art - Online Art Supplies was recently in Berlin after attending Creative World Messe Frankfurt on 26th January '13. After the exhibition, off to Berlin we went! We came across some interesting street art and also commissioned works on the Berlin Wall - or rather what was left of the Berlin Wall.
More photos are posted on our facebook page. Just click the shortcut on the right of our webpage to view them all!
Tue
15
Jan
2013
What do you want to do for yourself this year?
Why begin the New Year with resolutions that seem to be negative proposals about doing less of the things you enjoy?
Let me suggest some positive possibilities and since this is an art oriented blog my suggestions sway in that direction.
This year I resolve to:
Spend more time for creativity. Make creative time part of your daily activity, even if it's for 30 mins or 1 hour. Creative time is not optional, it gets the same priority as bathing- simply do it every day and eventually it becomes a must-have time in your life.
Visit the museum every month. Art makes us all better people. Make it a point to visit the museums once a month. Whether it's attending a private art event even if it's just for networking or simply soaking in the inspirations at the National Museum, make it a point to nourish your soul with the beauty of ART.
Visit a museum even when you are overseas on a holiday, it will show you how artists of different backgrounds feel and think and become inspired.
This can be combined with your resolution to spend more time with the popular 'spend more time with family and friends” resolution. Go see art together.
Begin to get creative by exploring painting, sketching, even doing crafts. It will make you a more rounded person as you develop and exercise your right brain functions.
Vibrant Art carries a full range of art materials and paints to satisfy from the creative child in us, to the most experienced, confident artist.
Our facebook has regular postings which I hope will inspire the artist in you.
Wishing all our friends, nothing less than the best for the year!
Sun
11
Nov
2012
Étude Student Oil Paints

The ETUDE oil paint range has stunningly brillant colours made with the same attention to quality as Sennelier Artist Quality Oil paints. Buttery in texture, it is perfect for creating smooth brushwork in thick applications or glazing.
ETUDE (also means student in French) range is affordably priced so that students and all you budding artists out there wanting quality colours at "bang for your buck" prices enjoy your introduction to the vibrant world of Sennelier!
Wed
07
Nov
2012
Hey Sennelier is available in Asia!
SENNELIER IS NOW AVAILABLE AT VIBRANT ART!
Sennelier is well known for their quality products and is the preferred product used by top artists all over the world.
Sennelier colors are saturated and intense. Their pastels are made from pigment, an inert, non-siccative binding medium that does not oxidise and has no effect upon either film stability or surface.
Free delivery for purchases over SGD100 (nett). We provide prompt delivery to your doorstep. Alternatively, you may choose to meet any of our friendly staff to pick up your purchases.
